The following are the steps required to set up a Google Analytics account. Don’t worry – it’s actually easier to carry out the process than read about it!
All steps are relatively straightforward – Google does a good job on guiding you through the process. The only step that may cause difficulty is inserting the tracking code into the HTML of your web pages. This is one of the last steps in the process.
Important: If you have a Google AdWords account, you should set up your Google Analytics account from within AdWords. If you do not have an AdWords account then you can follow the steps outlined below.
1. Sign up for Google Analytics
You can access the Google Analytics signup page at www.google.com/analytics/sign_up.html
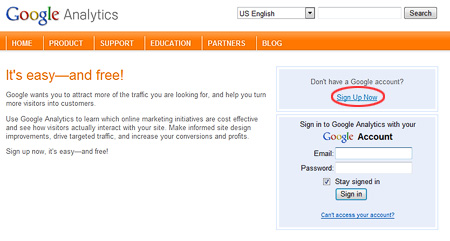
If you already have a Google account you just need to enter your email address and password. (Skip to step 4 below).
If you don’t have a Google Account you must sign up for one by clicking on the “Sign Up Now” link.
2. Create a Google Account
In the Create an Account form, fill in the appropriate fields – email address, password, location etc. A Google account can be created using any email address – it does not have to be a Gmail account.
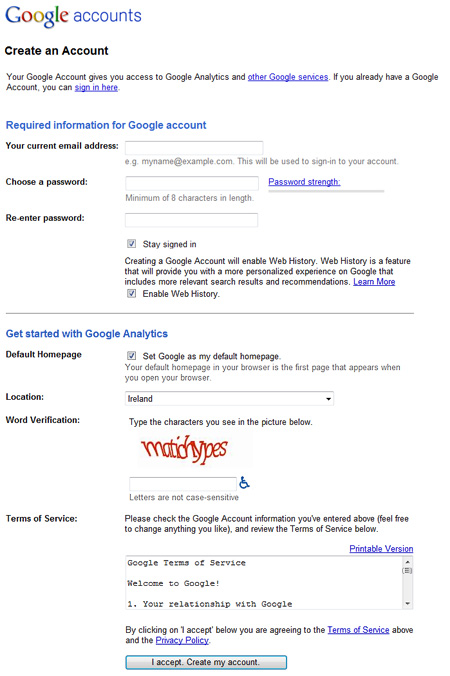
Once completed click “I accept. Create my Account”.
A verification email is then sent to the email address you specified. Click on the link within the email. Your web browser opens a webpage indicating that you have verified your account.
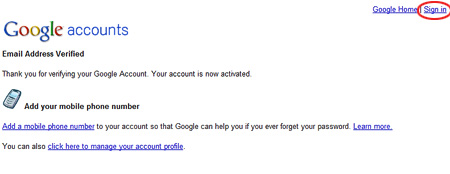
Click on the “sign in ” link on the top right.
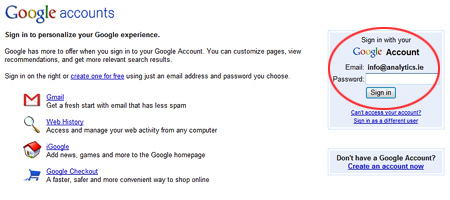
3. Sign in to your Google Account
On the web page that appears use your email address and password to sign in to your new Google Account.
4. Access Google Analytics
When successfully signed in, your Google Account settings page is displayed. Under the “My products” heading there should be a link entitled “Analytics”.
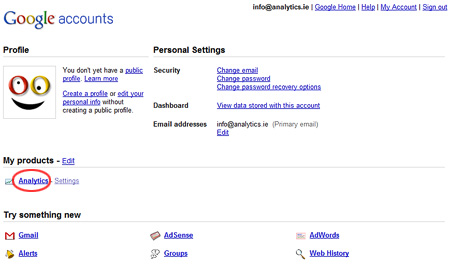
Clicking the “Analytics” link brings you to the Google Analytics “Getting started” page.
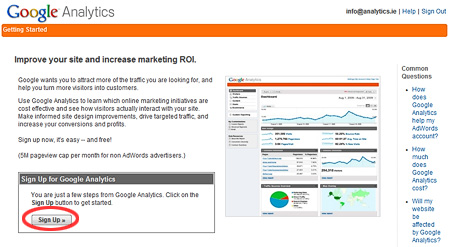
Click on the “Sign Up” button.
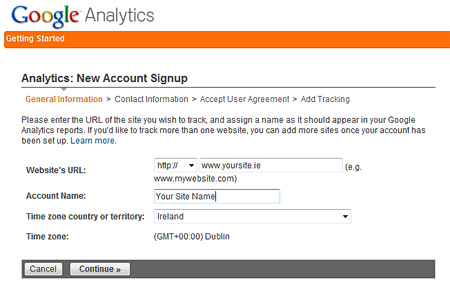
5. Analytics: New Account Signup
On the New Account Signup page, enter your website URL, your account name (typically your business or website name), and your time zone. Click continue.
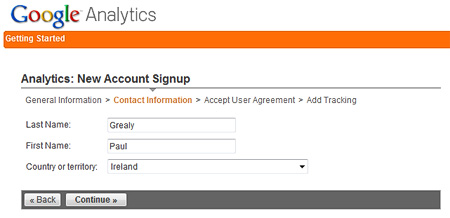
Enter your contact details – last name, first name, country. Click on “Continue”.
6. Agree to Terms and Conditions
To continue the process you must agree to the Terms and Conditions. You have also an option to share your Google Analytics data with Google.
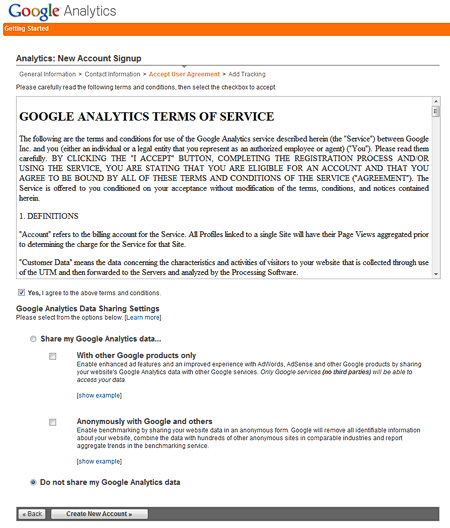
Click “Create New Account”.
7. Analytics: Tracking Instructions
Now the juicy stuff… you are presented with tracking code for your site. Google can provide the appropriate tracking code depending on whether you want to track:
- a single domain
- one domain with multiple sub domains
- multiple top-level domains
For this example we’ll go with the default – a single domain.
![]()
You must select and copy the tracking code from this page. The code should be placed on every page on your website that you want to track. The recommended placement position is just above the closing </body> tag which can be found at the bottom of each page:
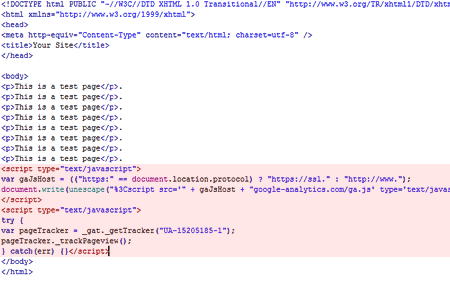
Now click “Save and Finish”.
8. Account Overview Page
That’s it! Your Google Analytics account is created. The Overview page now shows the profile you have just created.
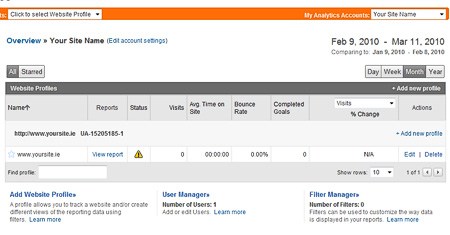
Google Analytics is now configured to collect traffic data from your website. Initially the status icon shows a warning icon. This icon will disappear once data starts appearing in your profile – typically within 2 to 24 hours.
9. What Next?
Now that your Google Analytics account is successfully setup and collecting data, you should configure your setup to suit your business requirements. Such configuration includes setting up profiles for specific target groups eg. Irish visitors only, filtering staff visits to site etc. This is a topic I will address in a subsequent post.


